
Crafted for Flavor and Health
Of course, I wouldn’t expect you to sacrifice any flavor! I’ve never been one to keep eat more than one or two pieces of jerky at a time, but I could eat a whole bag of Jolly Good
Jolly Good Jerky Seasoning

A Versatile Treat for All Ages
Indeed one of the beauties of our jerky is its versatility. It’s perfect for all ages, from the young ones who enjoy it as a tasty and nourishing school snack to the seasoned explorers who carry it on their journeys. It’s a go-to option that fits seamlessly into any lifestyle.
Simple Steps to Culinary Excellence
Crafting your own batch of Jolly Good Jerky is an easy and rewarding process. Just follow these steps:
- Combine the dry seasoning, liquid smoke, and coconut aminos to create a flavorful marinade.
- Marinate your lean beef or wild game strips in this blend overnight, letting the flavors meld, or add the marinade to your ground meat.
- Sprinkle with black or red pepper, if desired.
- Dehydrate the marinated meat until it reaches your desired texture, preserving its goodness.

Above all, once you’ve made your jerky, you can enjoy it knowing you’ve crafted a snack that’s free from additives, preservatives, and unhealthy elements. Store it as indicated below, and you can indulge in its delightful taste for days to come.
Enjoy the satisfaction of creating your own flavorful and nutritious jerky that fuels your body and excites your palate. Whether you’re an outdoor enthusiast or just a lover of good food, this jerky is a must-try culinary adventure.
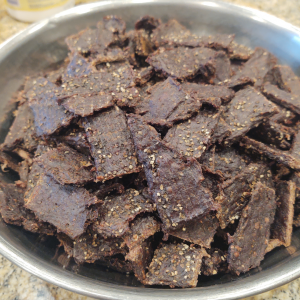
Jolly Good Jerky
Ingredients
- 9 tablespoons plus 1 teaspoon Jolly Good Jerky Seasoning
- 1 cup coconut aminos
- 1 tablespoon liquid smoke
- 5 pounds lean meat, less than 10% fat, ground or strips cut 1/8- to 1/4-inch thick (See PREP TIP)
- 1/4 cup coarsely ground black pepper, , or to taste
Instructions
- In a 2-cup glass measuring cup or bowl, combine the seasoning, coconut aminos, and liquid smoke. Whisk to combine.
- If using meat strips, put the meat strips in a large bowl or zip-seal bag. Pour the liquid mixture over the meat and mix to thoroughly coat all sides of the meat. Cover or seal and marinate in the refrigerator overnight or up to 24 hours. The longer it marinates, the more flavor it will absorb.Spread out evenly on dehydrator racks in a single layer, not overlapping. Generously sprinkle with pepper. Discard the marinade.
- If using ground meat, put the meat in a large bowl and pour the liquid over the meat. Using your hands or a large spatula, thoroughly incorporate the liquid evenly into the meat. The liquid and seasoning will "stain" the meat so continue mixing until the meat color is consistent throughout. Next, take 1/4 to 1/2 of the mixture and press flat on parchment paper then gently use a rolling pin until the meat is 1/4-inch thick. Sprinkle generously with course ground pepper. Cut into strips with a pizza cutter. Transfer the strips to the dehydrator racks, pepper-side down. Sprinkle the other side with pepper. Repeat with the remaining meat mixture.
- Dehydrate at 165°F (See NOTE 1) for 6 1/2 to 7 hours until it reaches your desired texture (See NOTE 2). Turn each strip over about halfway through.
- STORAGE: Allow the jerky to cool for several hours before storing it in airtight containers. Store in a dark, cool place for up to 5 days, in the refrigerator for up to 4 weeks, or in the freezer for up to 6 months. Vacuum sealing will extend the shelf life to 2 months as long as the packages remain unopened. Once opened, store the package in the refrigerator.
- PREP TIP: It is easier to slice meat when it is partially frozen. For a chewy jerky, slice the meat with the grain and not more than 1/4-inch thick. Slicing meat across the grain will make it easier to break off pieces, unlike slicing meat with the grain.
- VARIATION TIP: If you prefer not to use coconut aminos, you can use low-sodium, gluten-free soy sauce or tamari, replacing about 2 tablespoons of the liquid with raw, local honey.